The node addition process can be done via API, simplified over infra as code choices that OCI can offer but to better illustrate the example will be used OCI web console.
Navigate:
OCI Web Console Hamburger Menu >> Hybrid >> VMware Solution – Click on software defined datacenter that will be increased.
Important: Check region and Compartment to be able to correct find the SDDC.
Now click in blue button [Create ESXi Host]

The dialog asking the license model will appear. Confirm licensing model – normally the first option will apply. Is also possible to specify a distinct name if you don’t specify the provisioning process will assume the name defined adding the suffix of current node count plus one.
![]()
Once launch the request to create the new this host will appear as creating state. Once the process completes will became Active state this process normally takes 1h to complete.
![]()
Once the new node became in Active state, we are ready to start the post steps. Closing OCI phase.
The node created on VMware solution became available a can be added into the SCDC.
Now we need to enter to vCenter. Navigate to OCI Web Console Hamburger Menu >> Hybrid >> VMware Solution — click on SDDC deployment. Click vCenter link. Logging using proper credentials.
On vCenter web UI expand Hosts and right button at the cluster. Select “add host”.
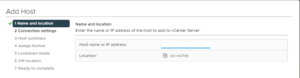
Fill the value of the ESXi Hostname complete name. Click next.
Fill Username will be root and password is the same password for vSphere.
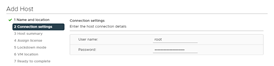
Once the communication is OK and password is correct click YES at security alert to accept the certificate.
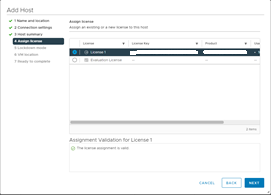
Now click next to accept the license.
Define the VM location and click next
This is the summary page. Review and click on finish.
Verify the activity summary and click finish. This step closes the node addition process to the cluster.

Now the new node can be seen on vCenter but some additional steps will be required to became available.
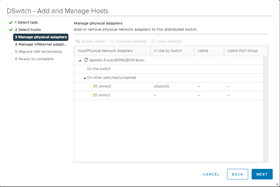
On vCenter web UI go to network>> DSwitch >> Add and Manage hosts
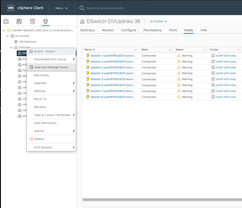
Click “Add hosts”
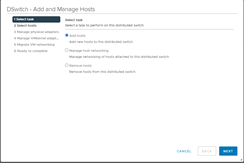
Click “+New Hosts”
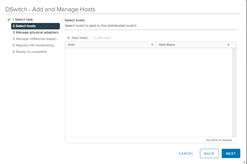
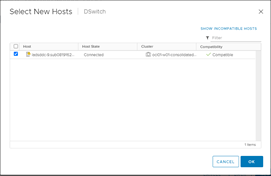
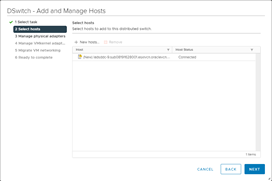
The new host will be displayed. Check the new host checkbox and click next.
Click Next
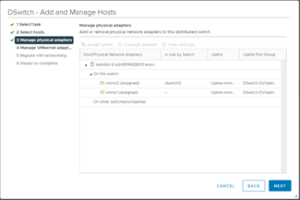
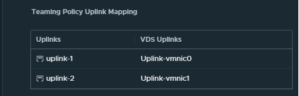
This step you need to map the physical adapters. NIC0 & NIC1.
Once assign the physical adapters click next.
Now is required to map the vmkernel adapters. Go one by one and match the source port group against the destination port group.
The new unmapped host will be presented as bellow.
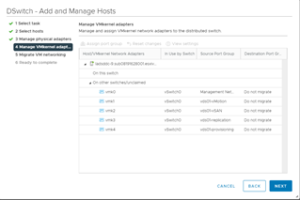
Port group assignment process sample.
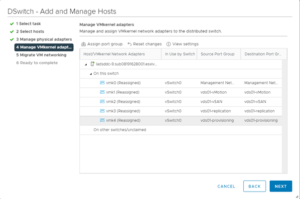
- Click vMotion select vds01v-Motion click Assign and select the vds01v-Motion.
- vSAN select vds01v-SAN click Assign and select the vds01v-SAN.
- replication select vds01v-replication click Assign and select the vds01v-replication.
- provisioning select vds01v- provisioning click Assign and select the vds01v- provisioning
The mapping process final state must map the source with the respective destination. Observe the source and destination keep the same standard name this simplify the process.
Check if you reach the same state.
Click next. The subsequent dialog asks if is required to migrate any VM. For this scope and sample is not required. Click next, then finish.
Next step NSX manager to adjust the network configuration.
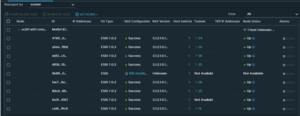
On NSX Manager Go to System>>Fabric>>nodes
On the top of main Paine select “Managed by vCEnter” you will be able to reach the list of all nodes and will be able to see the new node as status not available.
Click on check mark of the new host than click configure NSX. Adjust the name if required and click next.

NSX installation dialog will launch. Adjust the host details if required and select:
Name of DSwitch
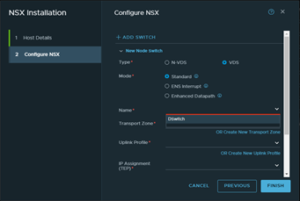
Fill Configure NEX dialog as follows:
Transport Zone: Overlay TZ, VLAN TZ
Uplink Profile: oci-w01hp-consolidated01
IP Assignment: Use-IP-Pool
IP Pool: VTEP-IP-Pool

Scroll down the screen and click edit in each UPLink – Edit is the pencil icon at the right end row of each uplink.
Then the NSX deployment will start. Wait the process conclusion You can go back to the list of all hosts and check the process evolution.
Click at the new host and check the process completion details should be success and connections up.
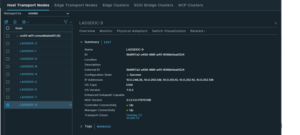
Network post configuration completed.
Prior navigate to the new host storage this is the current capacity of vSAN.

Hosts>Cluster>Configure>vSAN>Disk Management
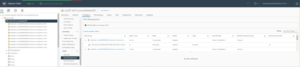
On Disk Management page click on Claim unused Disks.
The first row you can select clam for Capacity tier and change the row bellow to cache tier as the picture bellow.
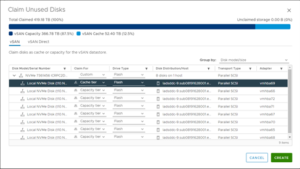
Once this last task is completed the claimed space shout be added to vSan storage

Now the unused storage is added to vSan Capacity.